Where have all my SharePoint tasks gone?
One of the questions I’ve been asked a few times recently is along the lines of “I’d like to see all of my outstanding tasks shown to me in one place, how can I do this?” This in particular seems to be something that applies to tasks as SharePoint stores tasks assigned to you in the site in which they’ve been assigned and thus they tend to end up scattered across the farm.
The good news is that using the Content Query Web Part (CQWP), it is easy to roll up all of your tasks from within a site collection into one place. Here’s how:
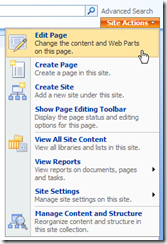
Edit the page you want to show the task roll-up on:
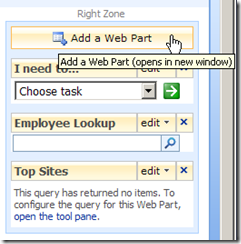
Add a web part to whichever zone you deem appropriate; I’ve chosen the Right Zone for this example:
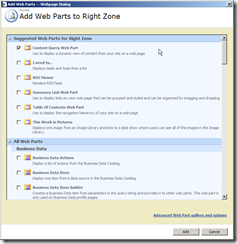
Select the Content Query Web Part from the list of available web parts and click OK:
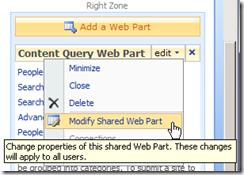
Now modify the shared web part we’ve just dropped onto the page:
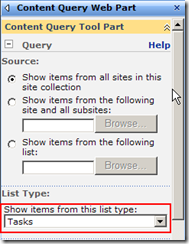
At the right of the page an extra panel will appear showing the options for the CQWP. We need to modify the settings in a few of these sections to change the data which is displayed. Start with the Query section and change the List Type dropdown to show Tasks:
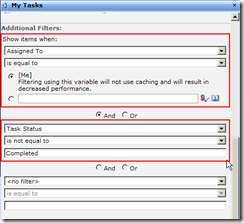
For a ‘My Tasks’ list to be useful, it should show only the tasks which relate to me and ideally only those tasks which are not yet complete. This can be achieved by modifying the Additional Filters to limit the tasks shown only to those assigned to the currently logged in user and whose status is not ‘Completed’ (note that you should use ‘Task Status’ as the filter column in the latter case, not ‘Status’):
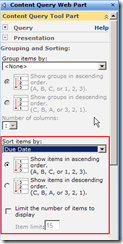
Next, if you wish, modify the Presentation section to sort the output from the query. In this instance I have elected to sort the tasks displayed by due date, and not limit the number of items displayed:
Finally, in the Appearance section, modify the title to be shown to the user; in this case I have chosen ‘My Tasks’:
Click OK at the bottom of the panel and the settings should close and show you the results of your work. In my case, this looked like this, with two tasks being pulled from different task lists:
The final thing to do if you have publishing switched on in the current site is to publish the page you’ve been modifying so that your users can see it. If you don’t have publishing switched on, click the ‘Exit Edit Mode’ link which will have appeared when you started editing the page.
