Deploying Files to the Logged-In User’s Profile Using Configuration Manager
I’ve had a number of cases where it would have been useful to be able to deploy files to a logged-in user’s profile on Windows using Configuration Manager (SCCM), but due to the context in which the ‘installation’ runs (i.e. the local system), using parameters such as %AppData% in a batch file doesn’t work, and this has always been an issue.
We recently wanted to push some custom backgrounds out to Microsoft Teams and I thought I’d spend a while trying to solve this issue. The following may not be the most elegant solution, but it seems to work reliably for me!
- We’re going to use PowerShell to detect the presence of a file. Copy the following into a file for the moment; we’ll need this PowerShell snippet shortly:
Function CurrentUser {
$LoggedInUser = get-wmiobject win32_computersystem | select username
$LoggedInUser = [string]$LoggedInUser
$LoggedInUser = $LoggedInUser.split("=")
$LoggedInUser = $LoggedInUser[1]
$LoggedInUser = $LoggedInUser.split("}")
$LoggedInUser = $LoggedInUser[0]
$LoggedInUser = $LoggedInUser.split("\")
$LoggedInUser = $LoggedInUser[1]
Return $LoggedInUser
}
$user = CurrentUser
start-sleep 30
$AppPath = "C:\Users\" + $user + "\AppData\Roaming\Microsoft\Teams\Backgrounds\Uploads\CustomBackground.png"
If (Test-Path $AppPath) {
Write-Host "The application is installed"
}
We need the sleep function in the file as the detection runs pretty quickly after the deployment and we want to be sure that the file(s) we’re going to copy are in place before attempting to perform the detection. This script extracts the username (including domain) of the currently logged in user, then separates the actual username from the returned value allowing this to be inserted into the path for detecting the file.
- Create a PowerShell file similar to the detection script to perform the file deployment:
Function CurrentUser {
$LoggedInUser = get-wmiobject win32_computersystem | select username
$LoggedInUser = [string]$LoggedInUser
$LoggedInUser = $LoggedInUser.split("=")
$LoggedInUser = $LoggedInUser[1]
$LoggedInUser = $LoggedInUser.split("}")
$LoggedInUser = $LoggedInUser[0]
$LoggedInUser = $LoggedInUser.split("\")
$LoggedInUser = $LoggedInUser[1]
Return $LoggedInUser
}
$user = CurrentUser
$AppPath = "C:\Users\" + $user + "\AppData\Roaming\Microsoft\Teams\Backgrounds\Uploads\"
cp ".\Backgrounds\*.png" -Destination $AppPath -Confirm:$false –Force
I saved mine as ‘Deploy-TeamsBackgrounds.ps1’. This script uses the same logic as the detection script, above, to determine the username and allows us to use this in the path to copy the file(s) to.
- Create a batch file to call the PowerShell file that does the actual file deployment:
Powershell -NoProfile -ExecutionPolicy Bypass -file %~dp0Deploy-TeamsBackgrounds.ps1
I saved this as ‘Deploy-TeamsBackgrounds.bat’. This batch file runs PowerShell and passes in the filename of the scripts used to deploy the files to the user’s profile location. Ensure that the batch file and the deployment PowerShell script are in the same location somewhere suitable for SCCM to use as the application source (usually a share on the SCCM server). I then have a folder called ‘Backgrounds’ in the same location that contains the actual image files to be copied.
- Create a new application in Configuration Manager selecting ‘Manually specify the application information’:
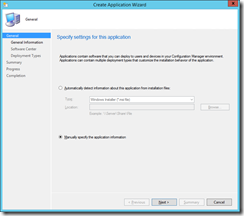
Then enter information on the name, publisher and version of the application: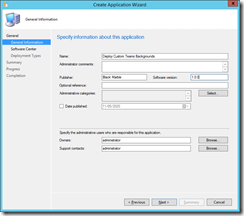
Add any required information for the Software Center entry: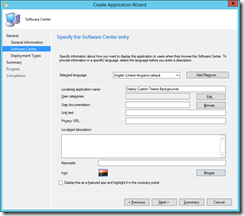
Click ‘Add’ to add a deployment type: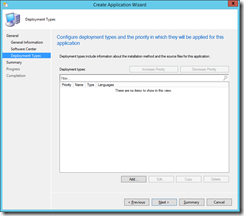
and select ‘Script installer’ from the drop-down. This will automatically select the ‘Manually specify the deployment type information’ option: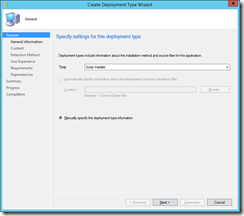
Provide a name for the deployment type: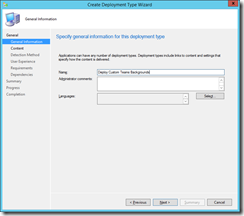
Specify the location that contains the files created earlier and the batch file as the command used to install the content: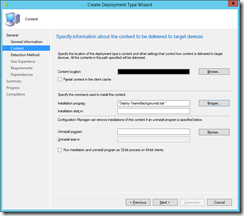
For the detection method, select ‘Use a custom script to detect the presence of this deployment type, the click the ‘Edit…’ button: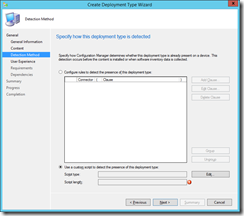
Select PowerShell from the Script type drop-down and then paste the detection script generated earlier: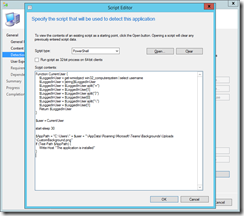
and click OK to close the script editor window.
Define the user experience: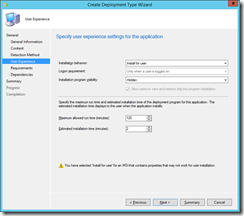
Note that I saw a warning shown at this point.
Define any requirements (e.g. only deploy on Windows 10) and dependencies, then click through to generate the application. - Distribute the content, then configure a deployment. I used the ‘All Staff’ user collection to deploy to.
Once the application appears in the Software Center, an end-user can click to install the custom backgrounds and the ‘application’ is downloaded to the Configuration Manager cache, then the batch file is triggered, which in turn executes the PowerShell script to copy the custom background images to the correct location in the user’s profile. The detection script then runs and detects the presence of the specified file.